Salesforce is a popular cloud-based customer relationship management (CRM) software provider. It enables companies to interactively connect with employees and customers, improve team performance, and close more deals. You can use Salesforce dashboards to organize and display multiple stats all on one screen. From fresh startups to fortune 500, Salesforce is nearly ubiquitous in all industries.
Historically, Salesforce customers share reports and data within their organization by paying for a Salesforce license for each employee. Some companies pursue a more economical solution; purchasing one Salesforce license and emailing the reports to employees who need to consume it. However, this method is inefficient as Salesforce allows bulk emailing only once a day. Managing sales departments and keeping the team on track to hit goals takes consistent management. One way to let everyone know where they are against goals and quotas is to present these same reports to a collective team in offices or in workgroups like Microsoft Teams and Slack channels. When it comes to sharing data that is frequently updated, and the company also wants to keep it economical, there is a better solution; displaying data on a TV screen.
Display Salesforce on TV Screen
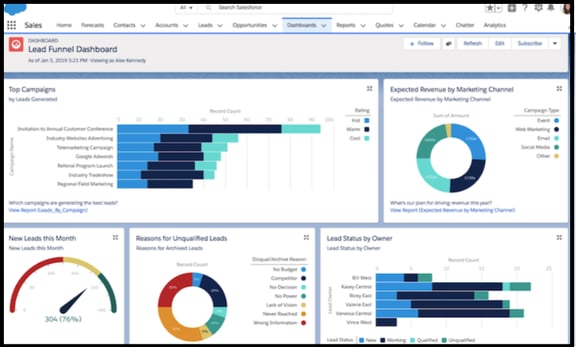
Presenting Salesforce reports and dashboards to a TV makes teamwork simpler and significantly enhances team performance. Teams can conveniently monitor key performance indicators (KPIs) through a KPI dashboard and effortlessly visualize reports during discussions, all from the same screen.
By displaying Salesforce data on a TV, employees are relieved from the need to open multiple links on their laptops and frequently switch windows, streamlining their workflow and improving productivity. This approach not only saves time but also reduces costs for the company, eliminating the necessity to manage multiple Salesforce licenses.
Web Browser Through the Smart TV
Salesforce can be displayed on a TV using a laptop. All you need to do is connect the laptop to the TV using an HDMI cable, log in to Salesforce on the laptop, and that’s it. Now your TV will show whatever Salesforce displays on the laptop. You can adjust the screen resolution according to your TV.
However, this method is not the best; the same laptop streaming Salesforce display to your TV can be used for other tasks rather than sitting idle and displaying just Salesforce. Moreover, your session will constantly expire, requiring a team member to babysit the laptop to ensure the user is not automatically logged out of Salesforce.
RocketScreens Digital Signage Software
RocketScreens helps companies share Salesforce TV dashboards with employees and customers without the headaches mentioned above. The software empowers your company to display content remotely on multiple digital signage screens simultaneously.

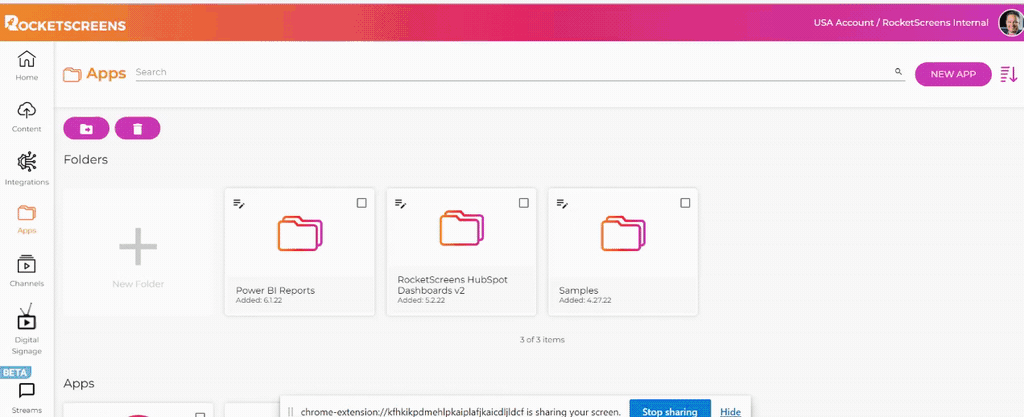
RocketScreens is a digital signage software designed to make sharing reports and team information easier. Whether it be displaying KPIs, ppts, pdfs, videos, or even dashboards of other tools, RocketScreens can do it all. There are Apps, My Channel & Slides, and Favorites columns on the left. As for now, it has over 100 supported apps; you can search for them in the search bar. Simply drag and drop an app to the slides to add it to your channel. Then select the relevant properties to integrate the app with the other slides.
Once you sign in to RocketScreens, you can manage all popular apps like YouTube, Facebook, Twitter, Google, and Salesforce to put on screens in dynamic dashboards. You can even create content on Canva directly inside RocketScreens and share it with your audience without ever leaving the app. This flexibility enables the user to perform more in less time with less effort and resources.
How to set up Salesforce in RocketScreens?
Setting up Salesforce in RocketScreens to display on a digital signage screen like TVs is simple and easy. In fact, once you create the secure integration, grabbing new reports and dashboards, or sending them to other TVs is a snap. All you need to do is create a channel where you can add multiple dashboards and reports. Once the channel is created, Salesforce needs to be embedded and signed in on RocketScreens. If you don’t have a RocketScreens account, you can create a free RocketScreens account. After that, to set up Salesforce in RocketScreens digital signage, follow the below steps.
1. Creating The Secure Integration for your Salesforce System.
So, this step is the most important and challenging of all. We have created both a video and a step-by-step how-to. This will require Administrator access in your Salesforce systems to continue.
There are two ways to create this integration link either one will get you. The first one is to click on the Integration menu and follow to create a new secure integration to Salesforce.
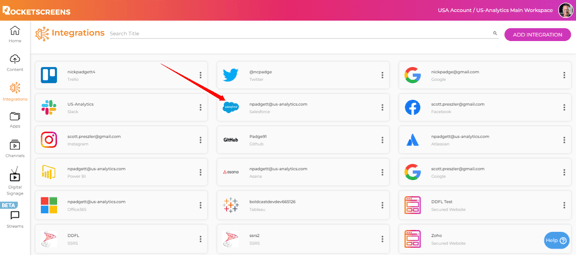
The second step is to go to the apps tab and create a New App link for Salesforce. This will require you to either integrate with an established integration or create a new one. The configuration information will be gathered from your instance of Salesforce. Clicking the Salesforce integration will open a window. Before you authenticate Salesforce and authorize the RocketScreens to connect to it, you need to make some small configurations on the Salesforce side.

Follow the instructions on our Knowledge Base to configure Salesforce: https://knowledge.rocketscreens.com/en/knowledge/how-can-i-show-salesforce-dashboards-on-my-tv.
Once complete, RocketScreens will tell you when you’re ready to move on.
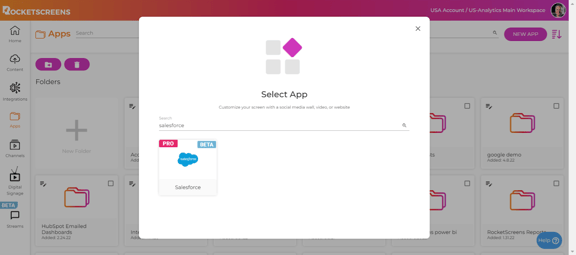
2. Create a New Salesforce Application that can be added to a Channel
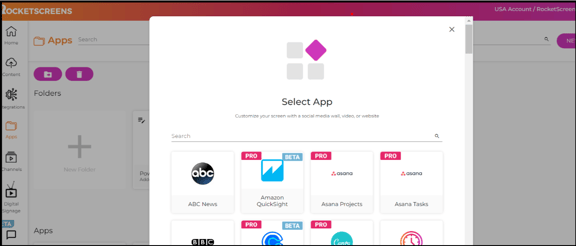
After setting up the Salesforce integration, go to the Apps tab on the menus to create a Salesforce App that can grab specific reports or dashboards. Select the New App tab and search for the salesforce app.
Now name the app and tag the applications so they can be found in the future. Pick the Salesforce secure integration built in Step 1. Choose the reports and/or dashboard you want RocketScreens to connect to and display in the channel. Other options include the ability to scroll longer reports, Show a QR link when the report was refreshed, or the screenshot date and time stamp. Now this application can be added to one or multiple channels, schedules, and digital signage players.

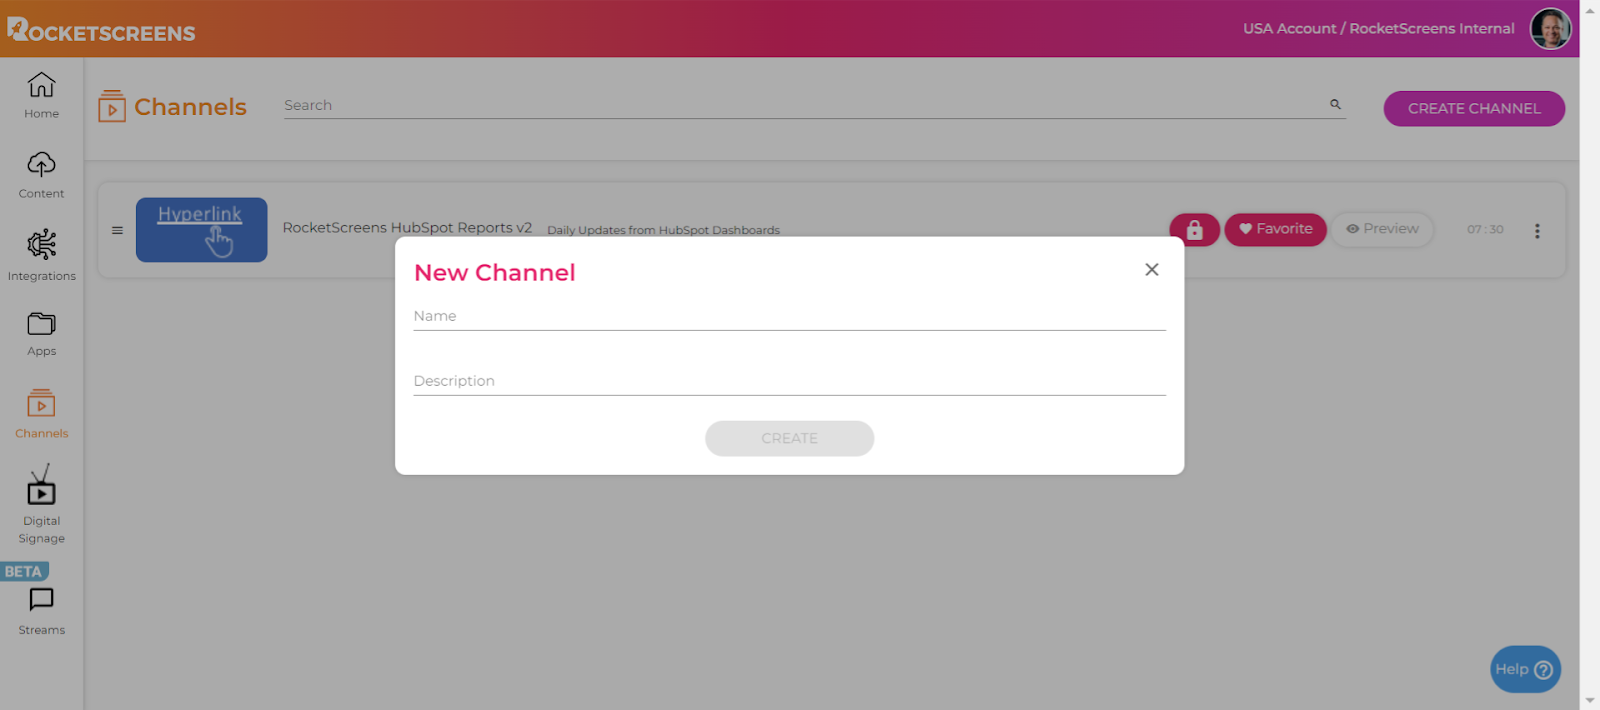
3. Creating a Channel
The next step is creating a channel. Open the channel screen from the dashboard and click the CREATE CHANNEL button to make a new channel. Adding a distinctive name but also a good description is important to keep the channel on point. Because you can build multiple channels, letting others in the system know who or what this channel will be used for keeps it on point.
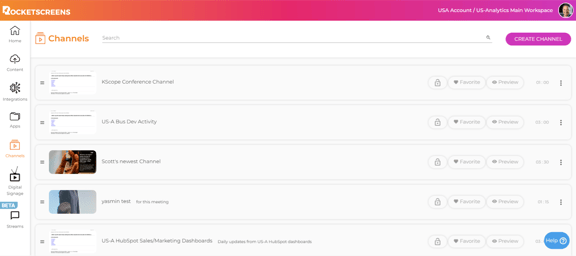
Click on the channel image to open it and see all the apps that are included in the grouping; you will find useful tools to edit it. On the left side of each channel, you can lock it, make it a favorite, edit it, and change the time it is to run. By clicking the three dots, other options like duplication, deletion, additional tags, and a second way to edit the channel details.
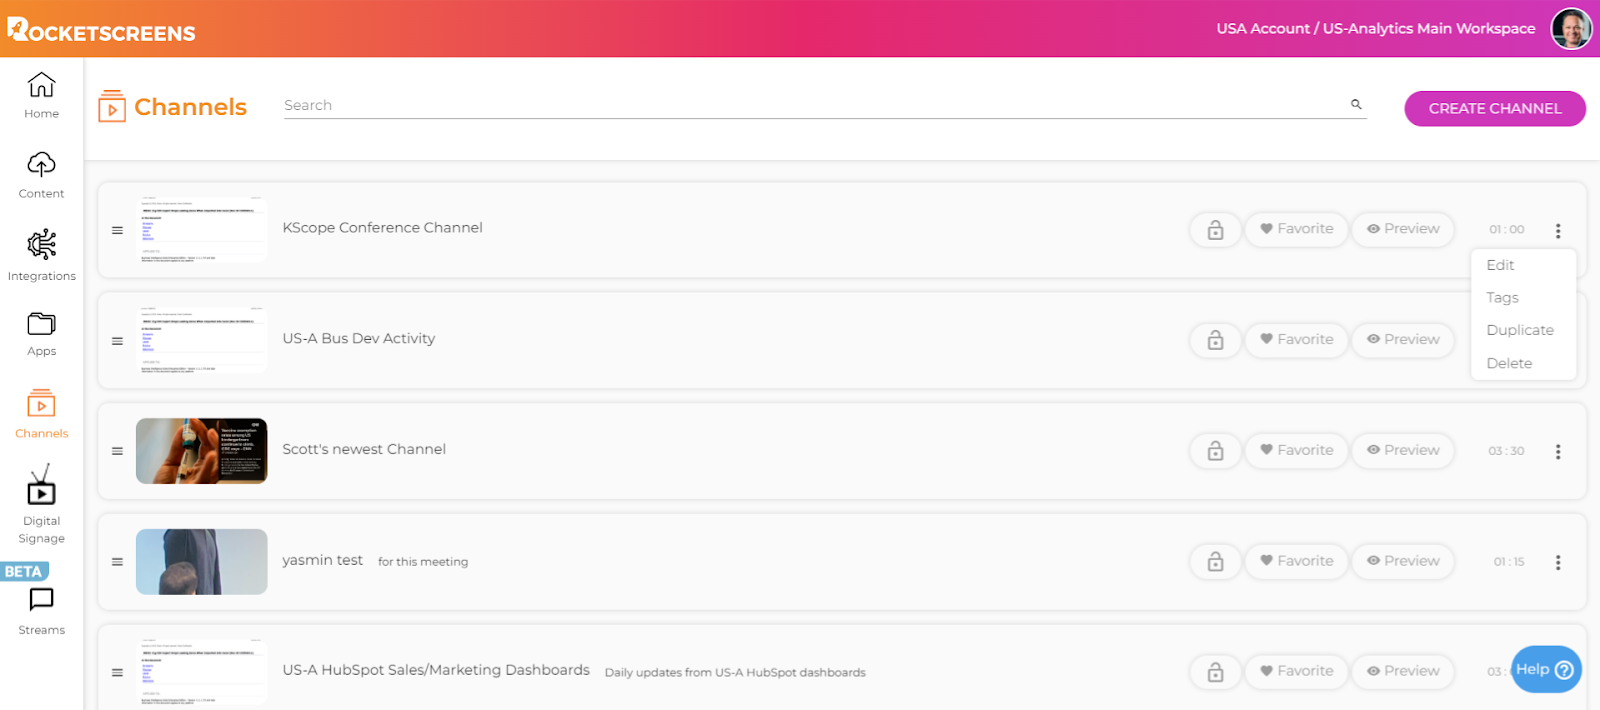
You can shuffle the app order by simply dragging and dropping.
4. Creating a Player
Once you have created a channel, we need to register a player to show it. Registering a Player is straightforward. Open RocketScreens Dashboard and follow these steps. Click on the “Create Player” button on the top right corner of the Digital Signage Menu screen.
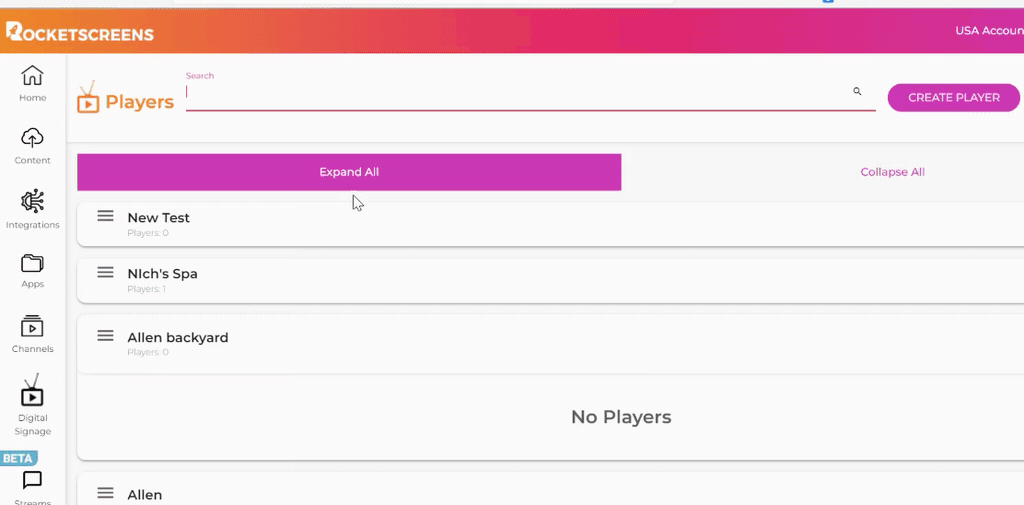
There are 3 options for a new player.
Option 1. Is a physical player, and this requires a piece of hardware like an Amazon FireStick or an Android Device or TV.
Option 2. Is a Desktop Player. This is a downloadable piece of software that allows you to create a player on either your PC or Mac Desktop. For this trial, this is a good way to quickly try out the technology and see how it will look on a screen in an office.
Option 3. This is Web Player. Allow you to create a hyperlink that can be placed in intranets, Microsoft Teams, and/or Slack. This allows any playlist or channel to be viewed anywhere in the world simultaneously and is great for groups and or teams who are hybrid.
Once you have decided which player to use, you must register the player in the window by naming it; if it is a physical device or a desktop player, you need to put in the code shown below the QR code. Then you pick a channel and/or a schedule. You can even take a snapshot of the tv itself to remember where it is located.

Lastly, you will select the channel you want to play. Click claim, and you will have a new device. Click on the device name on the home screen to edit the device, like adding channels, scheduling the content, and much more.
Select the integration you created, the Dashboard, and enable some options, such as scrolling or displaying a QR code. Once finished, click the Save button.
Congratulations, your salesforce report is ready for your TV screen or digital signage screens. Now you can rapidly get your reports on any TV.